How to Wrap Text in Google Docs? Text wrapping is an essential and valuable feature for content creators and publishers.
Text wrap will help you control how your document is presented to readers in a visually appealing manner.
Follow the simple step-by-step guide to learn more about text wrapping and how to use it to your advantage.

How to Wrap Text in Google Docs
The first two steps are for users who need to learn how to insert an image in Google Docs. Others skip to “Step 4” directly.
How to wrap text around an image in Google docs
Wrapping text around an image can enhance the overall appearance of your document.
Step 1:
Open a new or existing Google Doc with content and place your cursor exactly where you want to Insert an image.
Step 2:
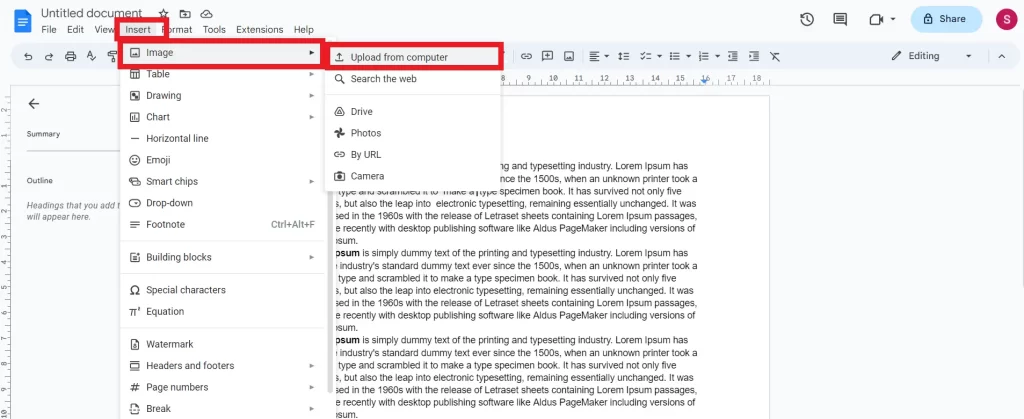
Now, click Insert in the Google Docs menu and choose Image from the dropdown to find the Upload from computer menu.
Click on the Upload from computer menu to upload an Image.
Step 3:
Once the Image is uploaded, click on the Image to select and resize it using the square-shaped marker point that appears at the corners of the Image.
Step 4:
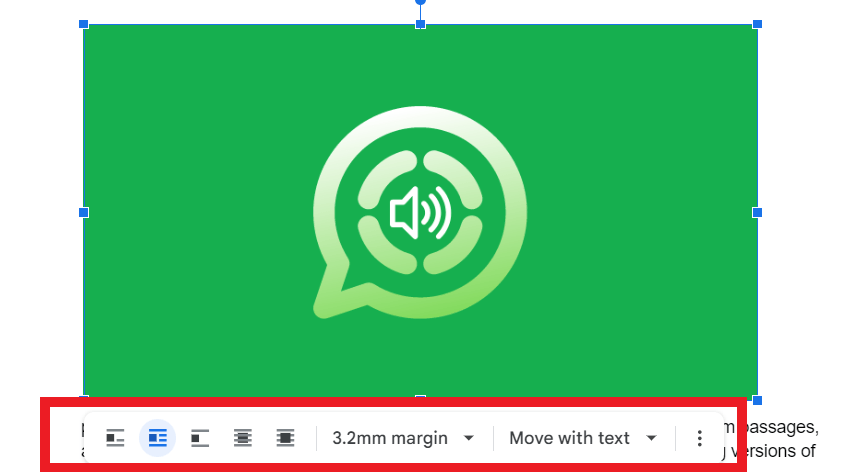
Now, when you click the Image, you will find a small toolbar with five different text wrapping options.
- In line with text
- Wrap text
- Break text
- Behind text
- In front of text
Note: If you want to Wrap your content around an image, the second option, “Wrap text,” is all you need.
If you want more control over text wrapping and margins in Google Docs, continue reading.
Google Docs image options
You can access Google Docs image options in 3 ways, we will see all the options one by one, and you can use whatever works for you.
Method 1:
Step 1:
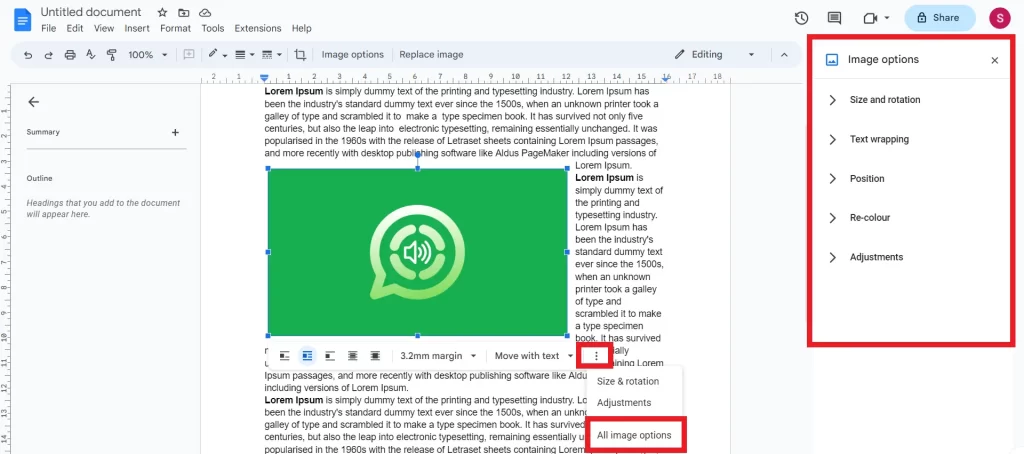
Click on the Image in the Google Doc to get the toolbar with text wrapping options.
Step 2:
Click the More icon (three vertical dots) at the end of the toolbar and choose All image options to access all the tools to improve or align your Image.
Method 2:
When you click/select the Image, you will find a toolbar on top below the main menu.

Step 1:
Choose Image options from the main toolbar.
Step 2:
Click on Image options in the right side to access Text wrapping settings.
Method 3:
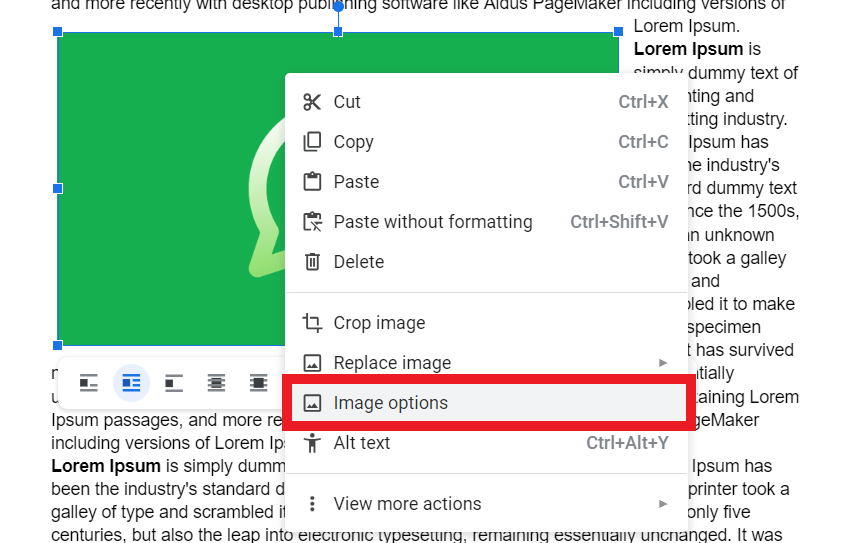
Right-click on the Image and select “Image options.”
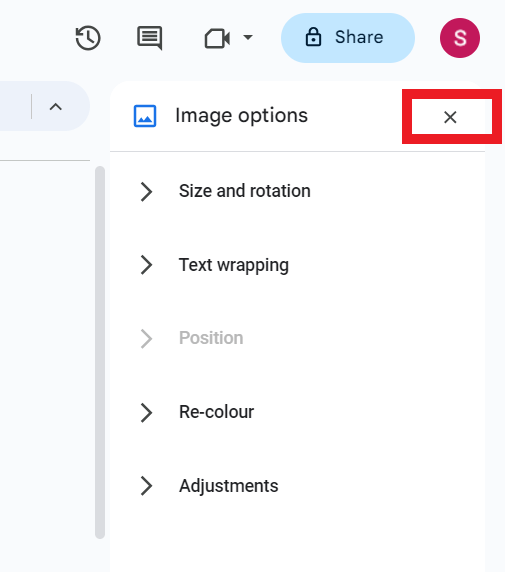
Google Docs how to close image options pane
Click the close (x) icon in the top right corner to close the Image options pane.
Troubleshoot text wrap issues
- If the wrap text option is missing, follow the steps mentioned in the article or refresh your Google Docs.
- If you are experiencing difficulties, sign out and sign back into your Google account
I hope you found the solution you were looking for in my article on how to “Wrap Text” in Google Docs.
I have also shared all the other text-wrapping options available in Google Docs with images.
If you have any queries about this article, please let me know in the comments section.
Frequently Asked Questions
Does google docs have text wrapping?
Yes, Google Docs has text wrapping, and it is helpful to align your content to make your document professional and presentable.
You can also do more than just “text wrapping“; you can adjust your image margins and edit your Image to fit your document.
Can I choose which side of the Image the text wraps in?
Yes, you can choose which side of the Image the text wraps in. In the “Image options” panel, you can choose any option from the following choices.
Both sides, Left only, Right only, are in the “Text wrapping” section.
Can I wrap text with specific margins?
You can use the margins feature in the text wrapping section of image options to adjust the margin around your Image.
Does Google Docs have the option to edit images?
You can edit your Image on Google Docs, but only limited options are available.
You can choose from the predefined set of colors to change your image background.
You can also adjust your image brightness, opacity, and contrast of the Image in the adjustment section in the image options.
Google Docs image wrap text not showing
You cannot find the wrap text option directly in the menu.
Instead, when you select an image, you will find a mini toolbar with five text-wrapping options.
Select the second option to wrap your text.
What do I do if the wrap text option is missing from Google Docs?
Follow the steps mentioned above in the article to find the Wrap text option.
If the issue persists, refresh or sign out and sign in to your Google account.
Click on the Image to find the Wrap Text button/icon (second icon).
Is there a keyboard shortcut for text wrapping around images in Google Docs?
No, there are no shortcut options. You can access the “Text wrapping” options only by right-clicking on the Image or from the toolbar.
How to Insert Word Art in Google Docs
How to rotate image in Google Docs
How to connect Bluetooth headphones to Laptop

